

Blind tasting wine like an expert: your practical guide
TL;DR:
- Blind tasting wine like an expert depends on applying a formal, evidence-based sequence of sight, nose, palate, and conclusion. Consistently recording observations on a tasting grid, in the correct environment, and with structured practice helps build reliable sensory memory.
Experts don’t guess. They deduce. Blind tasting wine like an expert means applying a formal, repeatable sequence — the WSET Systematic Approach to Tasting (SAT) or the Court of Master Sommeliers deductive method — to generate evidence-based conclusions rather than inspired hunches. The sequence never changes: sight, then nose, then palate, then conclusion. Every observation feeds a tasting grid, and every conclusion needs supporting evidence.
Before you pour a drop, nail the basics:
- Pour an appropriate amount per glass, filled to a level that allows the wine to breathe and you to swirl it without spilling.
- Serve whites, rosé, and sparkling wines chilled to a cool temperature; reds and orange wines at a moderate cool temperature.
- Use a white background (such as a sheet of paper) to facilitate accurate colour assessment.
- Record observations systematically on a tasting grid before drawing conclusions.
The grid is the whole game. It separates what you observe from what you infer, and that separation is what makes your final call defensible rather than lucky.
Table of Contents
- How do you set up a blind tasting station properly?
- The deductive tasting method, step by step
- What does an effective practice routine look like?
- What cognitive traps derail blind tasters?
- How do you write a tasting note that actually defends your call?
- What advanced clues help you pinpoint region and style?
- Key takeaways
- The learning curve is longer than the internet suggests
- Premium practice bottles without the treasure hunt
- Useful sources
How do you set up a blind tasting station properly?
Setup errors are silent killers. A warm red, a smoky room, or a mismatched glass will corrupt your sensory data before you’ve taken a single sniff. Get the environment right first.
Bright, neutral lighting is non-negotiable for colour assessment. Natural daylight is ideal; a white LED is a solid substitute. The room should be aroma-free — no candles, no perfume, no garlic bread from the kitchen. A white sheet of paper or a white tablecloth gives you the background you need to read hue and intensity accurately.
Glassware matters more than most beginners expect. Use matching all-purpose glasses for every wine in the flight — ISO tasting glasses are the standard, but any tulip-shaped glass works. Pour 60–75 ml per glass, which is roughly one-third full. That fill level concentrates aromas at the rim and gives you room to swirl.
Temperature is where most home tastings go wrong. Whites pulled straight from a standard fridge (around 4 °C) are too cold; reds left on a bench in an Australian summer are too warm. Pull whites out 15 minutes before pouring and chill reds briefly if needed. Sequence your flight from lightest to most full-bodied, and from driest to sweetest, to protect palate clarity across the session.
A spit bucket isn’t optional if you’re tasting more than four wines. Neither is a pen and a printed grid. Label each glass with a number, not a name. Optional but useful: a Coravin or small 187 ml bottles for preserving samples between sessions.
Pro Tip: Cover each glass with a small card between assessments. It slows oxidation and stops you unconsciously re-sniffing a wine before you’ve finished the previous one.
The deductive tasting method, step by step
This is the method. Sight, nose, palate, conclusion — in that order, every time. Skipping ahead to conclusions before you’ve finished the palate is the single most common mistake, and it costs accuracy.
Sight
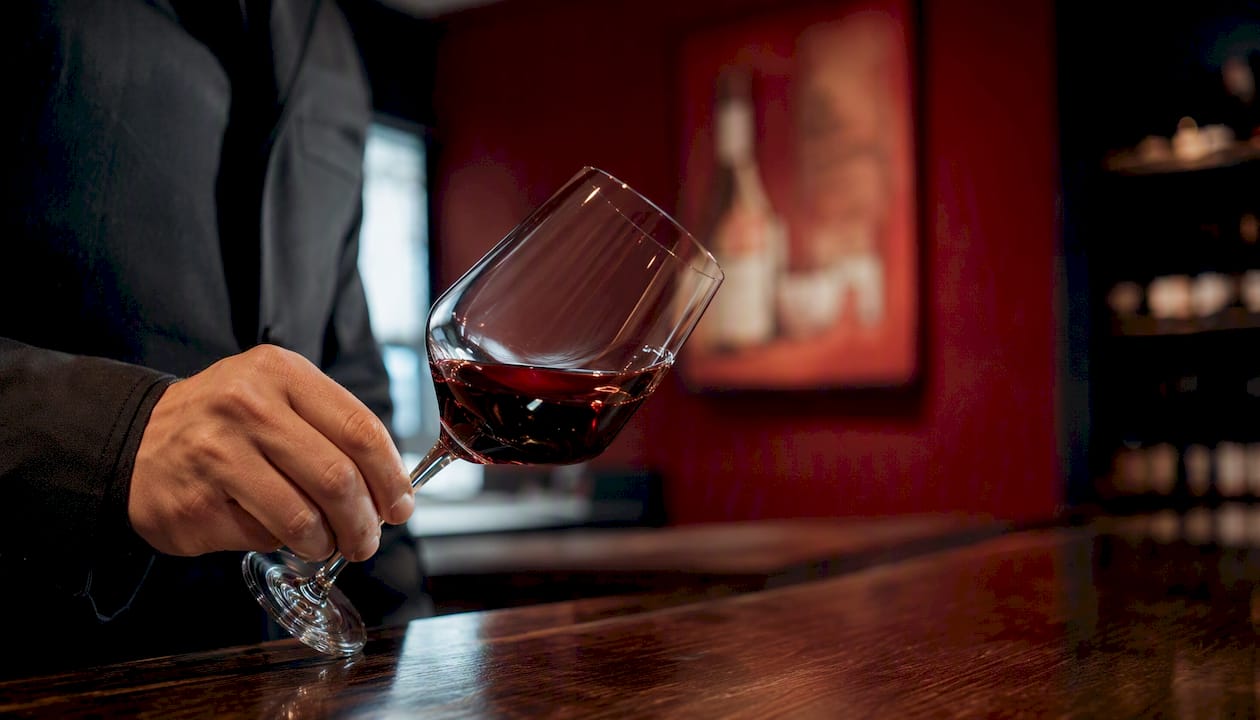
Tilt the glass against your white background. Record colour (lemon, gold, amber for whites; purple, ruby, garnet, tawny for reds), intensity (pale, medium, deep), and rim variation. A wide, pale rim on a red often signals age or a cool climate. Deep, inky purple with little rim variation points to a young, warm-climate wine.
Nose
Smell the wine before you swirl. That first sniff captures the most delicate aromatics before alcohol takes over. Then swirl and sniff again. Categorise what you find: primary aromas (fruit, floral, herbaceous), secondary aromas (yeast-derived: brioche, cream, cheese rind), and tertiary aromas (oak and age: vanilla, cedar, leather, dried fruit). Note intensity and complexity.
Palate
Take a proper sip and slurp gently to pull air across the wine. This retronasal technique reveals flavours that orthonasal sniffing misses entirely. Assess sweetness, acidity (does your mouth water?), tannin (texture and grip on the gums), alcohol (warmth in the chest versus the throat), body, flavour intensity, and finish length.
Tasting grid: what to record
| Domain | What to assess | Why it matters |
|---|---|---|
| Sight | Colour, hue, intensity, rim | Indicates age, climate, variety |
| Nose | Primary/secondary/tertiary aromas, intensity | Narrows variety and winemaking style |
| Palate structure | Acidity, tannin, alcohol, body, sweetness | Maps to climate and geography |
| Finish | Length, flavour persistence | Signals quality level |
| Conclusion | Variety, region, vintage window, quality | The evidence-based call |
Once you’ve filled the grid, use structural clues to eliminate possibilities. High acidity with low tannin and green herb notes? Probably a cool-climate white. Ripe tannin, high alcohol, and dark fruit? Warm-climate red. Oak detection on a white wine narrows the style set significantly — it rules out unoaked Riesling and most Pinot Gris immediately.
Pro Tip: Use short sniffs alternated with one longer inhalation. Short sniffs limit olfactory adaptation; the longer one captures the full aromatic picture after your nose has reset.
What does an effective practice routine look like?
Random tasting reinforces random results. Structured drills build the sensory memory that makes identification faster and more accurate.
- Record, reveal, review. After every session, reveal the bottles and compare your notes to the actual wine. Reviewing incorrect calls is what converts repetition into real learning.
A practical weekly cadence: two focused sessions per week, 45–60 minutes each, tasting four to six wines per session. One session focuses on a single variety or region; the other mixes styles to build flexibility. After four weeks, retest wines you called incorrectly.
Developing your personal reference library of benchmark wines takes time, but the payoff is a mental map you can cross-reference in any blind tasting.
Pro Tip: Order your flight strategically: smell through all glasses first, then sequence your tasting from lightest to heaviest. Place wines you’re confident about early to build momentum and save your palate for the tricky ones.
What cognitive traps derail blind tasters?
The biggest enemy isn’t a difficult wine. It’s your own brain.
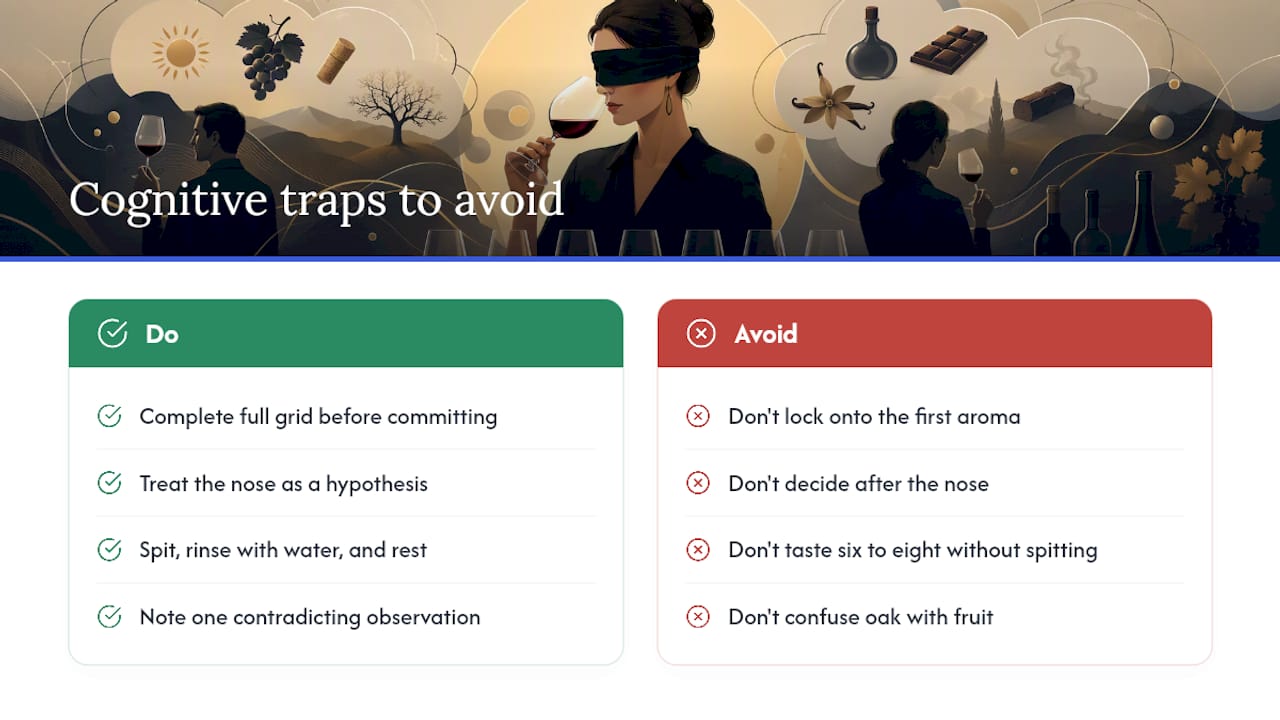
Anchoring is the most common trap: you catch one aroma — say, vanilla — and your brain locks onto “oaked Chardonnay” before you’ve assessed acidity or tannin. Every subsequent observation gets filtered through that premature call. The fix is to complete the full grid before committing to any variety.
Premature commitment is anchoring’s close cousin. You make a call after the nose and stop gathering evidence. Professionals treat the nose as a hypothesis, not a verdict.
Palate fatigue is physiological, not psychological, but it’s just as damaging. After six to eight wines without spitting, your ability to discriminate acidity and tannin degrades noticeably. Spit, rinse with water (not crackers, which coat the palate), and rest between wines.
Confusing oak with fruit is a beginner’s trap that persists longer than it should. Vanilla and coconut from new oak can mimic tropical fruit. Toasty oak can read as secondary fermentation character. The structural test — does the wine have the acidity and body to match the fruit profile? — usually resolves it.
Pro Tip: Write down at least one observation that contradicts your working hypothesis. If you can’t find one, you’re probably not looking hard enough.
How do you write a tasting note that actually defends your call?
A tasting note is a legal brief, not a poem. Every claim needs evidence. The tasting grid gives you the structure; the note is where you assemble the argument.
Here’s a worked example. You’re tasting a red wine. Your grid records: deep ruby, purple rim, intense nose of blackcurrant and graphite with a hint of cedar, high acidity, firm but ripe tannin, full body, 13.5% alcohol estimated, long finish. Your conclusion: Cabernet Sauvignon, likely Coonawarra or Margaret River, 3–7 years old, good to very good quality. Supporting evidence: graphite and blackcurrant are classic Cabernet markers; firm tannin and high acidity suggest cool-to-moderate climate; cedar indicates some oak ageing; the ripe (not green) tannin rules out a very cool or underripe vintage.
That’s a defensible identification. It might be wrong, but it’s reasoned. In a Court of Master Sommeliers exam, the quality of reasoning is weighted alongside the final answer.
| Parameter | Standard |
|---|---|
| Pour size | 60–75 ml |
| Red/orange wine serving temp | ≈ 15 °C |
| Ideal session length | 45–60 minutes |
| Wines per session (with spitting) | 4 |
Understanding how wine scoring works helps you calibrate your quality assessments against published benchmarks.
What advanced clues help you pinpoint region and style?
Once you can identify varieties reliably, the next challenge is geography. This is where structural nuance separates good tasters from great ones.
- Phenolic ripeness and tannin character. Ripe, plush tannin with high alcohol and dark fruit points to warm-climate growing. Green, grippy tannin with lower alcohol and red fruit suggests cooler conditions or earlier picking. In Australian terms: McLaren Vale Shiraz versus Yarra Valley Shiraz are almost different wines structurally.
- Alcohol placement. Warmth felt deep in the chest indicates higher ABV (above 14%). Warmth that fades quickly at the back of the throat suggests something leaner, likely 12–13%. This physical cue is one of the fastest brackets experts use.
- Lees character. Creamy texture, brioche, and a slightly savoury finish on a white wine signals extended lees contact — common in premium Hunter Valley Semillon aged in bottle, or in Burgundian-style Chardonnay.
- Oak species cues. American oak gives coconut and vanilla; French oak gives spice, cedar, and a finer grain. Both are detectable, and both narrow your regional options.
- Australian regional signatures. Barossa Valley Shiraz: dark fruit, chocolate, high alcohol, plush tannin. Clare Valley Riesling: lime zest, steely acidity, bone dry. Margaret River Cabernet: cassis, graphite, firm but polished tannin, medium-plus body. These are starting points, not rules — outliers exist, and vintage variation can shift a wine’s profile significantly.
Pro Tip: When a wine’s fruit profile and its structure don’t match your regional hypothesis, trust the structure. Fruit can be manipulated in the winery; acidity and tannin are much harder to fake.
Key takeaways
Blind tasting wine like an expert requires a structured deductive method, a completed tasting grid, and regular, reviewed practice — not talent, luck, or an expensive palate.
| Point | Details |
|---|---|
| Use a formal tasting sequence | Work through sight, nose, palate, and conclusion in order — never skip ahead. |
| Complete the grid before concluding | Record all structural observations before committing to a variety or region. |
| Practise with focused flights | Side-by-side single-variety flights build sensory memory faster than random tasting. |
| Review every incorrect call | Comparing your notes to the revealed bottle is what turns repetition into real improvement. |
| FU Wine for practice bottles | FU Wine’s rotating catalogue supplies varied benchmark bottles without the retail markup. |
The learning curve is longer than the internet suggests
Most guides make blind tasting sound like a puzzle with a clean solution. It isn’t. It’s a skill that builds slowly, unevenly, and with a lot of humbling misses along the way — and that’s completely normal.
The realistic trajectory: after two to three months of structured, twice-weekly practice, most tasters can reliably identify major varieties in familiar styles. Regional identification takes longer, often six to twelve months of deliberate work. Vintage windows are the hardest and the last to click.
What actually accelerates progress isn’t tasting more wine. It’s reviewing what you got wrong. Every incorrect call is a data point. Pull the bottle, re-read your notes, and identify the specific observation you missed or misread. Over time, those corrections build a mental reference library that no amount of casual drinking can replicate.
Perfectionism is the enemy here. A taster who commits to a reasoned call and gets it wrong learns more than one who hedges every conclusion with “could be either.” Make the call. Be wrong. Fix the error. Repeat.
Mix enjoyment with training, too. Not every bottle needs to be a study exercise. Some nights, the wine is just good and that’s enough.
Premium practice bottles without the treasure hunt
Building a varied practice flight used to mean visiting half a dozen retailers and paying full retail for the privilege. FU Wine cuts that friction entirely.
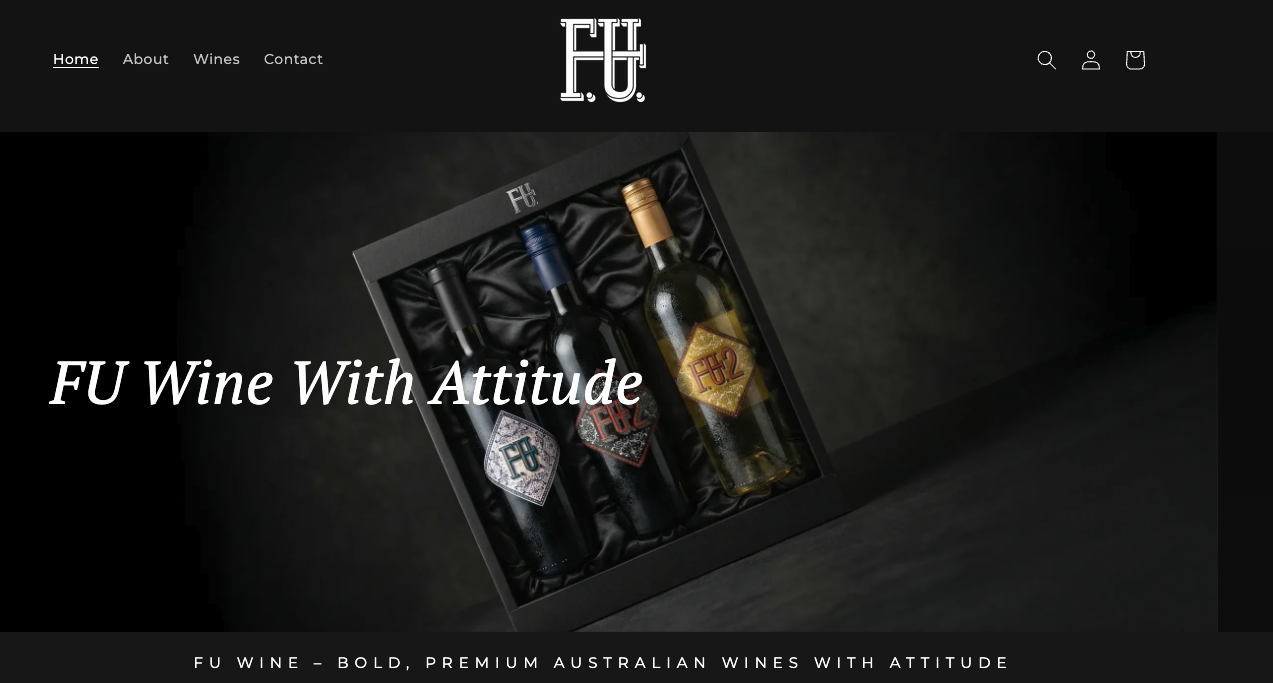
FU Wine’s rotating catalogue brings premium and hard-to-find Australian bottles — Barossa Shiraz, Clare Riesling, Margaret River Cabernet, Hunter Semillon — to one place, often at 30–70% below traditional retail. That means you can assemble a genuine benchmark flight across regions and styles without blowing your budget or your Saturday morning. Flash deals and limited drops keep the catalogue fresh, so there’s always something new to add to your reference set.
If you’d rather source locally, independent bottle shops and wine clubs are solid alternatives. But if you want variety, quality, and a price that doesn’t sting, browse the FU Wine wines collection and put together your next practice flight today.
Useful sources
These are the professional frameworks and practical guides that underpin this article. Worth bookmarking if you’re serious about developing your tasting skills.
- WSET Systematic Approach to Tasting (SAT) — WSET Level 4 material
- Blind tasting, part 1 – essential tools — Jancis Robinson
- How to taste wine — New Zealand Wine Authority
- The secret to blind tasting? Learn the ‘tasting grid’ — Wine Folly
- Blind Tasting Methodology: How Sommeliers Identify Wine — Sommelier Authority
- 6 Somms share their top tips for blind tasting — VinePair
- How to taste wine like a pro — Food & Wine