

Step by step cellar clearance guide for wine lovers
TL;DR:
- A cellar clearance involves systematically emptying, cleaning, and reorganising storage to optimise space and preserve contents. Proper sorting, safe disposal of hazardous materials, and effective organisation ensure long-term preservation and enjoyable wine access. The process transforms cluttered spaces into functional, accessible cellars that enhance collection value and usability.
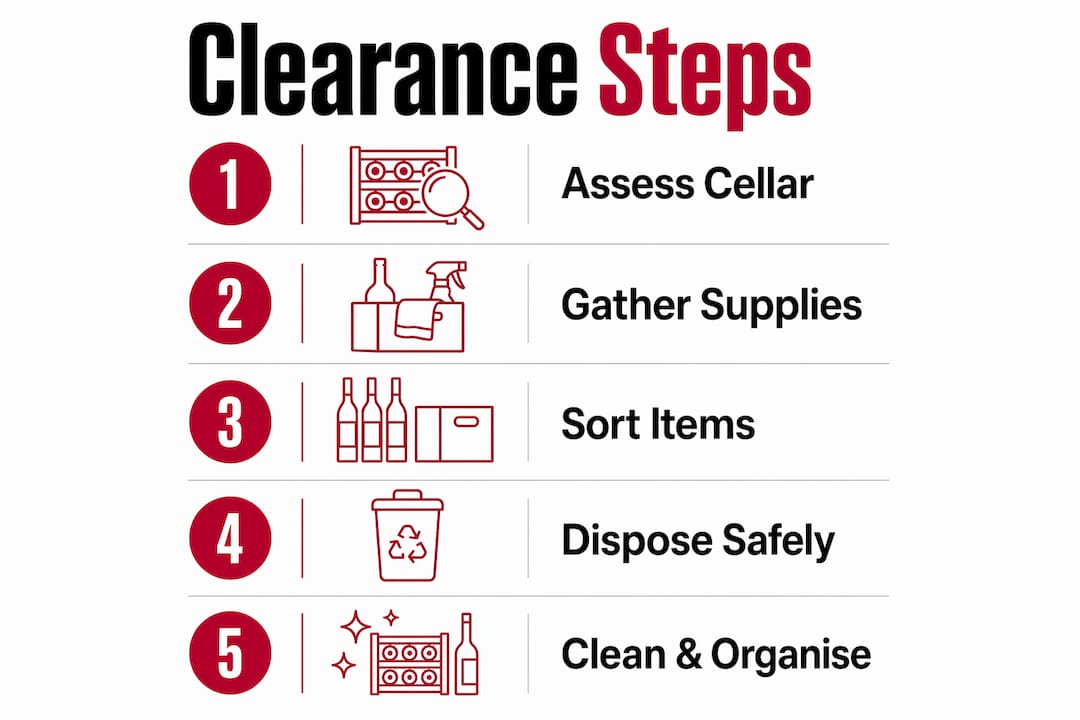
A cellar clearance is defined as the systematic process of emptying, sorting, cleaning, and reorganising a storage space to maximise usability and protect the contents inside. For wine collectors, this process is not just about tidying up. It directly affects the condition of your bottles, the accessibility of your collection, and the long-term value of what you’ve built. A proper step by step cellar clearance guide covers everything from grabbing your heavy-duty trash bags and gloves before you start, to setting up a labelled, temperature-controlled space you’ll actually enjoy using. Done right, this process transforms a chaotic, forgotten room into the most satisfying corner of your home.
What supplies do you need before starting a cellar clearance?
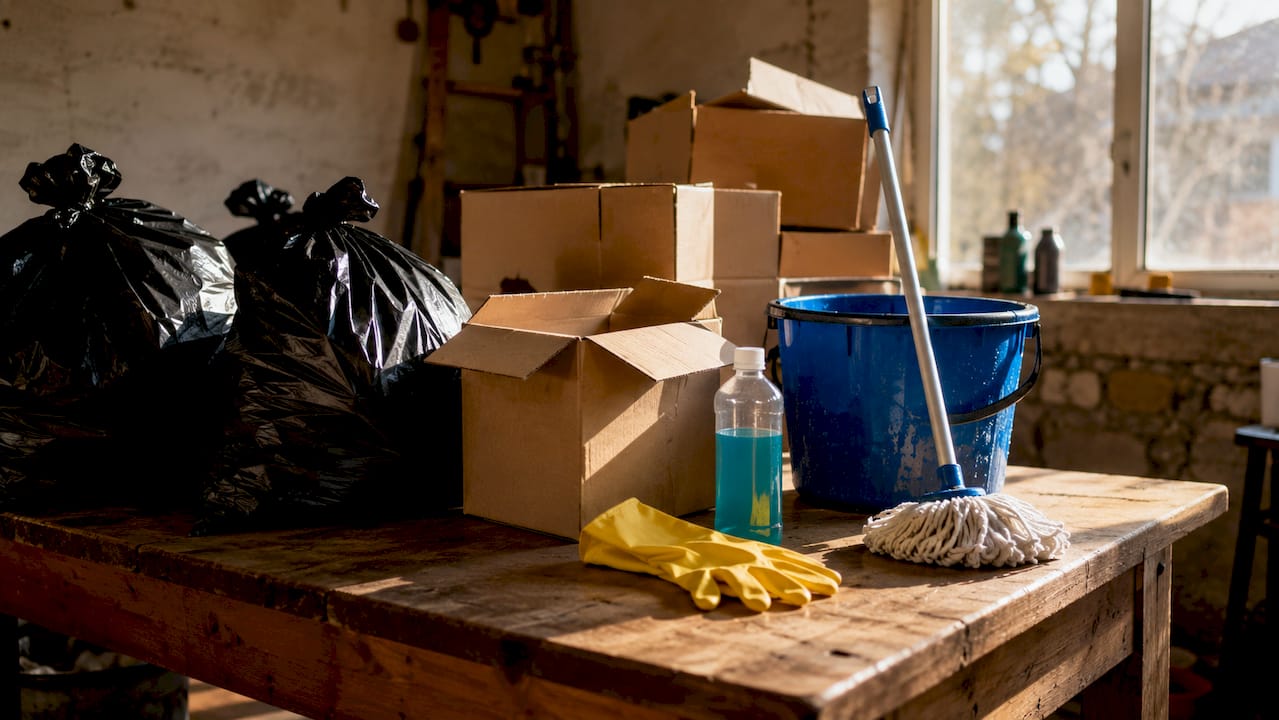
Preparation is the difference between a clearance that takes a weekend and one that drags on for weeks. Cellar clearance timelines range from a single day to four weeks depending on volume and complexity. Getting your supplies sorted before you open that cellar door cuts that timeline dramatically.
Your core kit needs to include heavy-duty trash bags, flat-pack boxes, disinfectant spray, a mop and bucket, permanent markers, clear adhesive labels, and protective gear including gloves and a P2 dust mask. The dust mask matters more than most people realise. Older cellars frequently harbour mould spores and allergens that become airborne the moment you start shifting things around.
Before you touch a single bottle or box, do a full walk-through assessment. Look for moisture damage on walls, signs of pests, and any structural concerns like cracked shelving or uneven flooring. A flashlight inspection of dark corners and behind shelving units reveals hidden mould or water damage that could create health risks mid-clearance.
Pro Tip: Measure your doorways and stairwells before you start moving large items. Ignoring access point dimensions is one of the most common reasons clearances stall halfway through.
Set your goals before you begin. Decide what you want the cellar to look like when you’re done. Are you creating a dedicated wine storage space? Reclaiming room for a dual-purpose area? Knowing the end state shapes every decision you make during the sort.
| Supply | Purpose |
|---|---|
| Heavy-duty trash bags | Bulk disposal of non-recyclable items |
| Flat-pack boxes | Sorting and temporary storage of keep items |
| P2 dust mask and gloves | Protection against mould, allergens, and sharp objects |
| Disinfectant and mop | Deep cleaning surfaces post-clearance |
| Labels and markers | Categorising and identifying sorted items |
How do you sort and categorise items during a cellar clearance?
The four-box sorting system is the gold standard for cellar decluttering. Professionals consistently use four categories: Keep, Donate, Recycle, and Dispose. Label four clearly separated zones in your cellar or at the top of the stairs, and commit to placing every single item into one of them. No “maybe” pile. That pile becomes a second cellar.
For wine-specific items, here is how the categories typically break down:
- Keep: Bottles you intend to drink within the next three years, wine racks in good condition, decanters, quality corkscrews, and temperature monitoring equipment.
- Donate: Surplus wine accessories in working order, extra glasses, unopened wine books, and functional furniture like small tables or shelving units.
- Recycle: Cardboard wine boxes, glass bottles you no longer want, and paper packaging.
- Dispose: Broken racks, cracked bottles, rusted tools, and anything with mould contamination.
The two-year rule is your decision-making shortcut for borderline items. If you have not used it in two years and cannot name a specific occasion when you will, it goes. This rule cuts through the emotional fog that turns a cellar clearance into a three-day stall.
Hazardous materials need their own process entirely. Old paint tins, batteries, cleaning chemicals, and pest control products cannot go into general waste. Set these aside in a clearly labelled box and take them to your local hazardous waste collection facility. This is not optional. Mixing hazardous waste with general rubbish creates contamination risks and, in most Australian states, carries legal consequences.
Pro Tip: When sorting wine bottles, check your collectible bottle guide before putting anything in the dispose pile. A bottle that looks unremarkable might be worth considerably more than you think.
Treat the sort like a treasure hunt rather than a chore. You will find bottles you forgot you had, accessories you paid good money for, and probably a few things that make you laugh. That mindset shift makes the whole process faster and far more enjoyable.
What are the best practices for safe disposal and donation?
Safe disposal protects you, your household, and the environment. Rushing this stage creates problems that outlast the clearance itself.
For bulk disposal of non-recyclable items, a skip bin or junk removal service is the most practical option for large cellars. Companies operating across major Australian cities offer same-day pickup for mixed loads, which removes the need for multiple council tip runs. For smaller volumes, your local council’s hard rubbish collection is a free and convenient alternative.
Donation is the most satisfying outcome for usable items. Wine accessories, furniture, and equipment in good condition are genuinely useful to others. Op shops run by organisations like the Salvos and Vinnies accept most household items. Some wine clubs and community groups actively seek donated wine books, racks, and accessories.
“Clearing out a cellar isn’t just about making space. It’s about making intentional decisions about what deserves to stay in your life and your collection.”
For hazardous materials, the disposal process requires a trip to a designated facility. Most Australian councils publish a list of hazardous waste drop-off points on their websites. Never pour chemicals down drains or into garden soil. The environmental damage is real and the fines are significant.
Wear gloves and closed-toe shoes throughout the disposal stage. Broken glass, rusted metal, and unstable shelving are the most common causes of injury during cellar clearances. Take your time with heavy items and ask for help rather than risking a back injury over a piece of furniture.
How do you clean and prepare your cellar after clearing?
A cleared cellar is not a clean cellar. The cleaning stage is where you address the conditions that will either protect or damage your wine collection going forward.
- Sweep and vacuum all surfaces. Start from the ceiling down. Cobwebs, dust, and debris collect on rafters and shelving brackets. Work downward so you are not re-contaminating surfaces you have already cleaned.
- Treat mould before disinfecting. If you find mould patches, treat them with a dedicated mould remover before applying general disinfectant. Mould treatment and moisture control are non-negotiable for maintaining ideal wine storage conditions. Untreated mould spreads and can penetrate cork, ruining bottles stored nearby.
- Disinfect all surfaces. Walls, floors, and shelving units all need a thorough wipe-down with a suitable disinfectant. Pay particular attention to corners and the base of walls where moisture tends to accumulate.
- Check and repair before you reorganise. Patch any cracks in walls, replace damaged shelving, and upgrade lighting if needed. A well-lit cellar makes it far easier to locate specific bottles and assess your collection at a glance.
- Address moisture at the source. If you found damp patches during the clearance, install a dehumidifier or improve ventilation before restocking. Persistent moisture above 75% relative humidity accelerates cork deterioration and encourages mould regrowth.
Pro Tip: Schedule a quick 15-minute cellar check every three months after the clearance. Catching a small moisture issue or a pest sign early costs almost nothing to fix. Ignoring it for a year costs you bottles.
How do you organise a wine cellar to maximise storage?
Organisation is where the clearance pays off. A well-organised wine cellar is not just aesthetically satisfying. It actively preserves your collection and makes every bottle easier to find and enjoy.
Zone designation, labelling, and appropriate storage are the three pillars of effective wine cellar organisation. Set up distinct zones based on drinking window, variety, or region. Bottles you plan to open within the next 12 months go in the most accessible zone. Long-term cellaring stock goes deeper in, where temperature is most stable.
Labelling is the system that makes everything else work. Use a combination of bin labels on your racks and a simple spreadsheet or app like Vivino or CellarTracker to track what you have, where it is, and when to drink it. Without a tracking system, a well-organised cellar becomes disorganised again within six months.
Storage considerations specific to wine include:
- Rack orientation: Store bottles horizontally to keep corks moist and prevent oxidation.
- Temperature: Maintain a consistent 12 to 14 degrees Celsius. Fluctuations damage wine faster than a consistently imperfect temperature.
- Humidity: Target 60 to 70% relative humidity. Too dry and corks shrink. Too wet and labels deteriorate and mould returns.
- Light: Keep the cellar dark or use low-UV LED lighting. UV light degrades wine compounds and accelerates ageing in ways you cannot reverse.
| Organisation method | Best suited for |
|---|---|
| Zone by drinking window | Active collections with regular rotation |
| Zone by variety or region | Large collections with diverse styles |
| Labelled bin system | Collectors who add and remove bottles frequently |
| Digital tracking app | Anyone managing more than 50 bottles |
Treat your cellar as a living collection that needs periodic evaluation. Every six months, walk through and assess what needs drinking soon, what you want to add, and what no longer fits your collection goals. This habit prevents the slow creep of clutter that made the clearance necessary in the first place. For guidance on building a collection worth organising, the FU Wine guide on building a wine portfolio is worth your time.
Key takeaways
A cellar clearance succeeds when you combine thorough preparation, a disciplined sorting system, safe disposal, deep cleaning, and a zone-based organisation strategy tailored to your wine collection.
| Point | Details |
|---|---|
| Prepare before you start | Gather supplies, assess cellar condition, and measure access points before moving anything. |
| Sort into four categories | Use Keep, Donate, Recycle, and Dispose to make fast, clear decisions on every item. |
| Dispose of hazardous materials correctly | Take old paint, batteries, and chemicals to designated local collection facilities. |
| Clean before you reorganise | Treat mould, address moisture, and repair shelving before restocking your cellar. |
| Organise by drinking window and label everything | Zone your collection by when you plan to drink it and track bottles with an app or spreadsheet. |
The clearance I almost didn’t finish (and what changed my mind)
I’ll be straight with you. The first time I tackled a serious cellar clearance, I stalled for three days on a single shelf of bottles I hadn’t touched in years. Not because I didn’t know what to do with them. Because I felt guilty about letting go of wines I’d bought with big intentions and never got around to opening.
That emotional drag is real, and it’s the part no checklist fully prepares you for. Basement clutter often represents emotional baggage. The clearance forces you to confront decisions you’ve been deferring for years. That’s uncomfortable. But it’s also where the value is.
What changed things for me was reframing the whole exercise. Instead of seeing it as a process of loss, I started treating it as curation. Every bottle I let go of made room for something I actually wanted to drink. Every rack I cleared gave me space to build a collection that reflected where my taste had gone, not where it started.
The practical advice I’d give anyone starting this process: work in two-hour blocks, not full days. Decision fatigue is real, and after about two hours of sorting, your judgement deteriorates. You start keeping things you should donate and donating things you should keep. Short sessions with clear stopping points produce better outcomes than marathon efforts.
A clean, well-organised cellar also changes how you interact with your wine. You open bottles more often. You drink better. You stop buying duplicates of things you already have. The clearance is not the end goal. It’s the reset that makes everything after it more enjoyable.
— Damien
Ready to fill your freshly cleared cellar?
You’ve done the hard work. The cellar is clean, organised, and ready. Now comes the genuinely fun part: filling it with wines worth keeping.

FU Wine exists for exactly this moment. No inflated retail prices. No gatekeeping. Just premium, hard-to-find bottles at prices that make sense, sourced directly from cellar clearances, allocation releases, and boutique producers. Think of it as the anti-establishment answer to restocking your collection. Flash deals, rare vintages, and high-scoring bottles that rotate constantly. You never know what’s coming next, which is half the fun. Head to FU Wine and see what’s available before someone else grabs it.
FAQ
How long does a cellar clearance take?
A cellar clearance takes anywhere from one day to four weeks depending on the size and complexity of the space. Dedicated teams can clear a moderate cellar in two days, while a solo effort on a large, cluttered space typically takes one to two weekends.
What is the four-box sorting system for cellar clearance?
The four-box system divides every item into Keep, Donate, Recycle, or Dispose. Professionals recommend this method because it forces a clear decision on each item and prevents the accumulation of a “maybe” pile that stalls progress.
Can I put old wine chemicals and paint in general rubbish?
No. Hazardous materials including old paint, batteries, and cellar chemicals must go to a designated local hazardous waste facility. Placing them in general waste is both environmentally harmful and, in most Australian states, a legal offence.
How do I maintain a wine cellar after clearing it?
Maintain your cellar by keeping temperature between 12 and 14 degrees Celsius, humidity between 60 and 70%, and scheduling a brief inspection every three months. Catching moisture or mould issues early prevents the conditions that make a full clearance necessary again.
What is the best way to organise wine bottles after a cellar clearance?
Zone your bottles by drinking window and store them horizontally on dedicated wine racks. Use a tracking app like Vivino or CellarTracker alongside physical bin labels so you can locate any bottle quickly and monitor what needs drinking before it peaks.